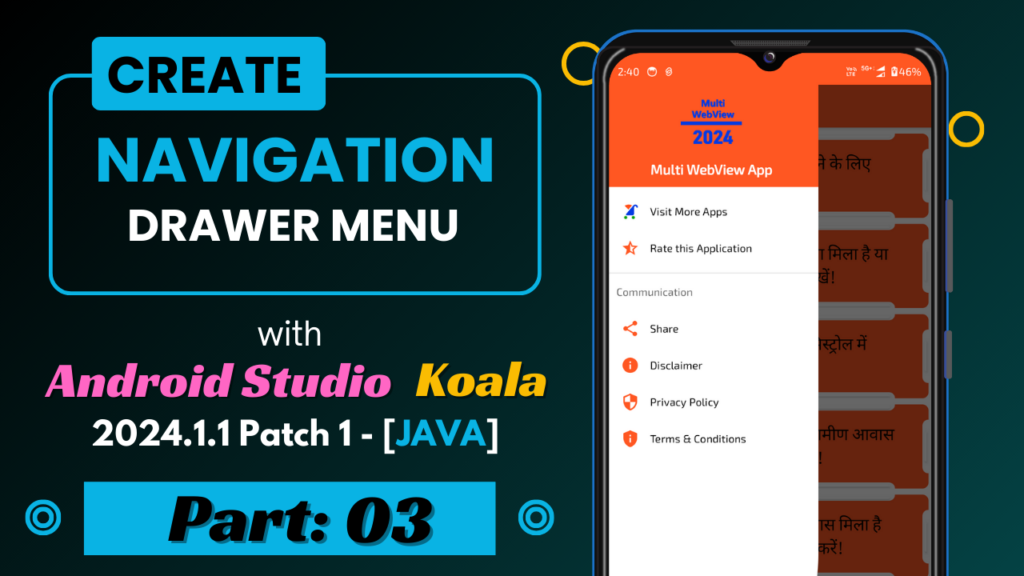
In this blog, we create a navigation drawer menu for a multi-webview app with the latest Android Studio [IDE]. And also we have to implement all code for the navigation drawer layout.
For a better understanding, you have to Watch a YouTube video.
NOTE: Use IDE Version:- [Android Studio Koala | 2024.1.1 Patch 1] Or Above !
Step: 01
First, we must create a navigation header layout with the codes below.
android:layout_height="176dp"
android:background="@color/purple_200"
android:fitsSystemWindows="true"
android:gravity="center"
android:orientation="vertical"
 <ImageView
        android:layout_width="80dp"
        android:layout_height="80dp"
        android:contentDescription="@string/app_name"
        android:elevation="4dp"
        android:src="@drawable/logo" />
 <TextView
        android:id="@+id/header_title"
        android:layout_width="match_parent"
        android:layout_height="wrap_content"
        android:layout_marginTop="8dp"
        android:gravity="center_horizontal"
        android:text="@string/custom_app_name"
        android:textAppearance="@style/TextAppearance.AppCompat.Medium"
        android:textColor="@color/white"
        android:textStyle="bold" />
Step: 02
Now create a navigation menu items icon that shows in the navigation drawer. The menu items are given below.
Get all the menu items icon file
Step: 03
Now, create navigation drawer menu items which are given below.
<?xml version="1.0" encoding="utf-8"?>
<menu xmlns:android="http://schemas.android.com/apk/res/android">
    <group android:checkableBehavior="single">

        <item
            android:id="@+id/nav_more_apps"
            android:icon="@drawable/ic_nav_menu_more_apps"
            android:title="@string/more_apps" />

        <item
            android:id="@+id/nav_rate_this_app"
            android:icon="@drawable/ic_nav_menu_star_half"
            android:title="@string/rate_this_app" />

    </group>
    <item android:title="@string/communication">
        <menu>
            <item
                android:id="@+id/nav_share"
                android:icon="@drawable/ic_nav_share"
                android:title="@string/share" />
            <item
                android:id="@+id/nav_disclaimer"
                android:icon="@drawable/ic_nav_menu_info"
                android:title="@string/disclaimer" />
            <item
                android:id="@+id/nav_privacy_policy"
                android:icon="@drawable/ic_nav_menu_security"
                android:title="@string/privacy_policy" />
            <item
                android:id="@+id/nav_terms_conditions"
                android:icon="@drawable/ic_nav_menu_privacy_tip"
                android:title="@string/terms_conditions" />
        </menu>
    </item>

</menu>
::: XML Layout Code Below :::
Step: 04
Now, we move the “activity_home.xml” layout and we create all layout step by step.
Create a Drawer Layout:
<?xml version="1.0" encoding="utf-8"?>
<androidx.drawerlayout.widget.DrawerLayout xmlns:android="http://schemas.android.com/apk/res/android"
    xmlns:app="http://schemas.android.com/apk/res-auto"
    xmlns:tools="http://schemas.android.com/tools"
    android:id="@+id/drawerLayout"
    android:layout_width="match_parent"
    android:layout_height="match_parent"
    android:background="@color/white"
    android:fitsSystemWindows="true"
    tools:context=".HomeActivity">

</androidx.drawerlayout.widget.DrawerLayout>
Create a CoordinatorLayout:
<androidx.coordinatorlayout.widget.CoordinatorLayout
    android:layout_width="match_parent"
    android:layout_height="match_parent">

</androidx.coordinatorlayout.widget.CoordinatorLayout>
Create an AppBar Layout:
<com.google.android.material.appbar.AppBarLayout
    android:id="@+id/appBarLayout"
    android:layout_width="match_parent"
    android:layout_height="wrap_content"
    android:theme="@style/ThemeOverlay.AppCompat.Dark.ActionBar">

</com.google.android.material.appbar.AppBarLayout>
Create a ToolBar Layout:
<androidx.appcompat.widget.Toolbar
    android:id="@+id/toolBar"
    android:layout_width="match_parent"
    android:layout_height="?attr/actionBarSize"
    android:theme="@style/ThemeOverlay.AppCompat.Dark.ActionBar">

</androidx.appcompat.widget.Toolbar>
Create a Constraint Layout:
<androidx.constraintlayout.widget.ConstraintLayout
    android:layout_width="match_parent"
    android:layout_height="match_parent">

</androidx.constraintlayout.widget.ConstraintLayout>
Create a TextView Layout:
<TextView
    android:id="@+id/textView"
    android:layout_width="0dp"
    android:layout_height="wrap_content"
    android:text="@string/custom_app_name"
    android:textAppearance="@style/TextAppearance.AppCompat.Large"
    android:textStyle="bold"
    app:layout_constraintBottom_toBottomOf="parent"
    app:layout_constraintEnd_toEndOf="parent"
    app:layout_constraintStart_toStartOf="parent"
    app:layout_constraintTop_toTopOf="parent" />
Create a Navigation View Layout:
<com.google.android.material.navigation.NavigationView
    android:id="@+id/navigationMenu"
    android:layout_width="wrap_content"
    android:layout_height="match_parent"
    android:layout_gravity="start"
    android:scrollbars="vertical"
    app:menu="@menu/navigation_menu" />
::: Java Codes Implemented Below :::
Step: 05
Now, go to the “HomeActivity.java” file and import the connect navigation drawer menu codes.
First, We Import Variable:
ActionBarDrawerToggle actionBarDrawerToggle;
View view;
private DrawerLayout drawerLayout;
Second, We Import ToolBar:
Toolbar toolbar = findViewById(R.id.toolBar);
        setSupportActionBar(toolbar);
        Objects.requireNonNull(getSupportActionBar()).setTitle(null);
        getSupportActionBar().setDisplayHomeAsUpEnabled(true);
Third, Import Drawer Layout:
drawerLayout = findViewById(R.id.drawerLayout);
        actionBarDrawerToggle = new ActionBarDrawerToggle(HomeActivity.this, drawerLayout, R.string.drawer_open, R.string.drawer_close);
        actionBarDrawerToggle.getDrawerArrowDrawable().setColor(getResources().getColor(R.color.white));
        drawerLayout.addDrawerListener(actionBarDrawerToggle);
        actionBarDrawerToggle.syncState();
Fourth, Create Navigation View:
NavigationView navigationView = findViewById(R.id.navigationMenu);
        view = navigationView.inflateHeaderView(R.layout.navigation_header);
        navigationView.setItemIconTintList(null);
Fifth, Create a set navigation Item Selected Listener:
  navigationView.setNavigationItemSelectedListener(item -> {
            UserMenuSelector(item);
            return false;
        });
Sixth, Import on option item selected method:
  @Override
    public boolean onOptionsItemSelected(@NonNull MenuItem item) {
        int id = item.getItemId();
        if (actionBarDrawerToggle.onOptionsItemSelected(item))
            return true;
        return super.onOptionsItemSelected(item);
    }
Seventh, Import on user menu selector method chosen:
private void UserMenuSelector(MenuItem item) {

    int itemID = item.getItemId();

    if (itemID == R.id.nav_more_apps) {

        try {
            Intent intent = new Intent(Intent.ACTION_VIEW, Uri.parse(getString(R.string.DeveloperApp)));
            startActivity(intent);
        } catch (Exception ex) {
            Intent intent = new Intent(Intent.ACTION_VIEW, Uri.parse(getString(R.string.developerApps)));
            startActivity(intent);
        }

    } else if (itemID == R.id.nav_rate_this_app) {
        try {
            startActivity(new Intent(Intent.ACTION_VIEW, Uri.parse("market://details?id=" + getPackageName())));

        } catch (ActivityNotFoundException e) {
            startActivity(new Intent(Intent.ACTION_VIEW, Uri.parse("http://play.google.com/store/apps/details?id=" + getPackageName())));
        }

    } else if (itemID == R.id.nav_share) {
        Intent myIntent = new Intent(Intent.ACTION_SEND);
        myIntent.setType(getString(R.string.text_plain));
        String shareBody = getString(R.string.AppDescription) + getString(R.string.AppLink);
        String shareSub = getString(R.string.sub_here);
        myIntent.putExtra(Intent.EXTRA_SUBJECT, shareSub);
        myIntent.putExtra(Intent.EXTRA_TEXT, shareBody);
        startActivity(Intent.createChooser(myIntent, getString(R.string.shareUsing)));

    } else if (itemID == R.id.nav_disclaimer) {

    } else if (itemID == R.id.nav_privacy_policy) {

    } else if (itemID == R.id.nav_terms_conditions) {

    }
    drawerLayout.closeDrawer(GravityCompat.START);
}
< :::::::::: Thank You :::::::::: >

![Splash Screen for Multi Webview App. || Part – 01 || with [ Java Language ].](https://click2code.com/wp-content/uploads/2024/07/Black-and-Yellow-Modern-Trading-Tutorial-YouTube-Thumbnail-1024x576.png)
![How to create a recycler view in fragment layout in Android Studio? | Part – 05[A] and 05[B] | Multi Webview App Tutorial](https://click2code.com/wp-content/uploads/2024/08/Black-and-Yellow-Modern-Trading-Tutorial-YouTube-Thumbnail-1-1024x576.png)

